Before I began developing the website I needed to gather resources from both of the businesses current site. This meant creating a list of products, gathering brand and product images, and getting organized. From there I was able to begin work in WordPress.
Step 1:
- Create our workspace. By using the cloud hosting system called Cloudways I am able to work on the website without taking the current live version down. This allows for a quick transition once the full site is finished and ready to go live. Once the website is complete I will be able to clone it and use it as a starting point for future ecommerce balloon websites.
Step 2: Upload plugins.
- Once the workspace is created it looks just like a regular WordPress website. We then upload Oxygen Builder which is the system I use for developing websites. During this time we add any other plugins that may be necessary for the website to function properly. A few of these plugins include fluent forms, Woocommerce, and Woo delivery so we can set custom delivery options.
Step 3: Assign global colors, typography, and headers.
- Using the companies already established branding sheet it is easy to input the global colors and fonts. This way whenever we add any text or colors all of the global types are already there.
Step 4: Import media.
- The next step in the process is to upload any media files to the site. This includes photos, design models, .pdf files, and any other media file. This was a lot of work since the website is selling many varied products.
Step 5: Create Templates
- Now that the website is built, our plugins added, and all the global elements are added we can start building out the website.
Oxygen Builder allows us to create templates that are then applied to other pages throughout the website. The first template to create is a header and footer that will be applied to our main page. Both the header and footer act as the bun in our website sandwich and everything we develop in-between is considered inner content or the meat of the sandwich.
Step 6: Inner Content
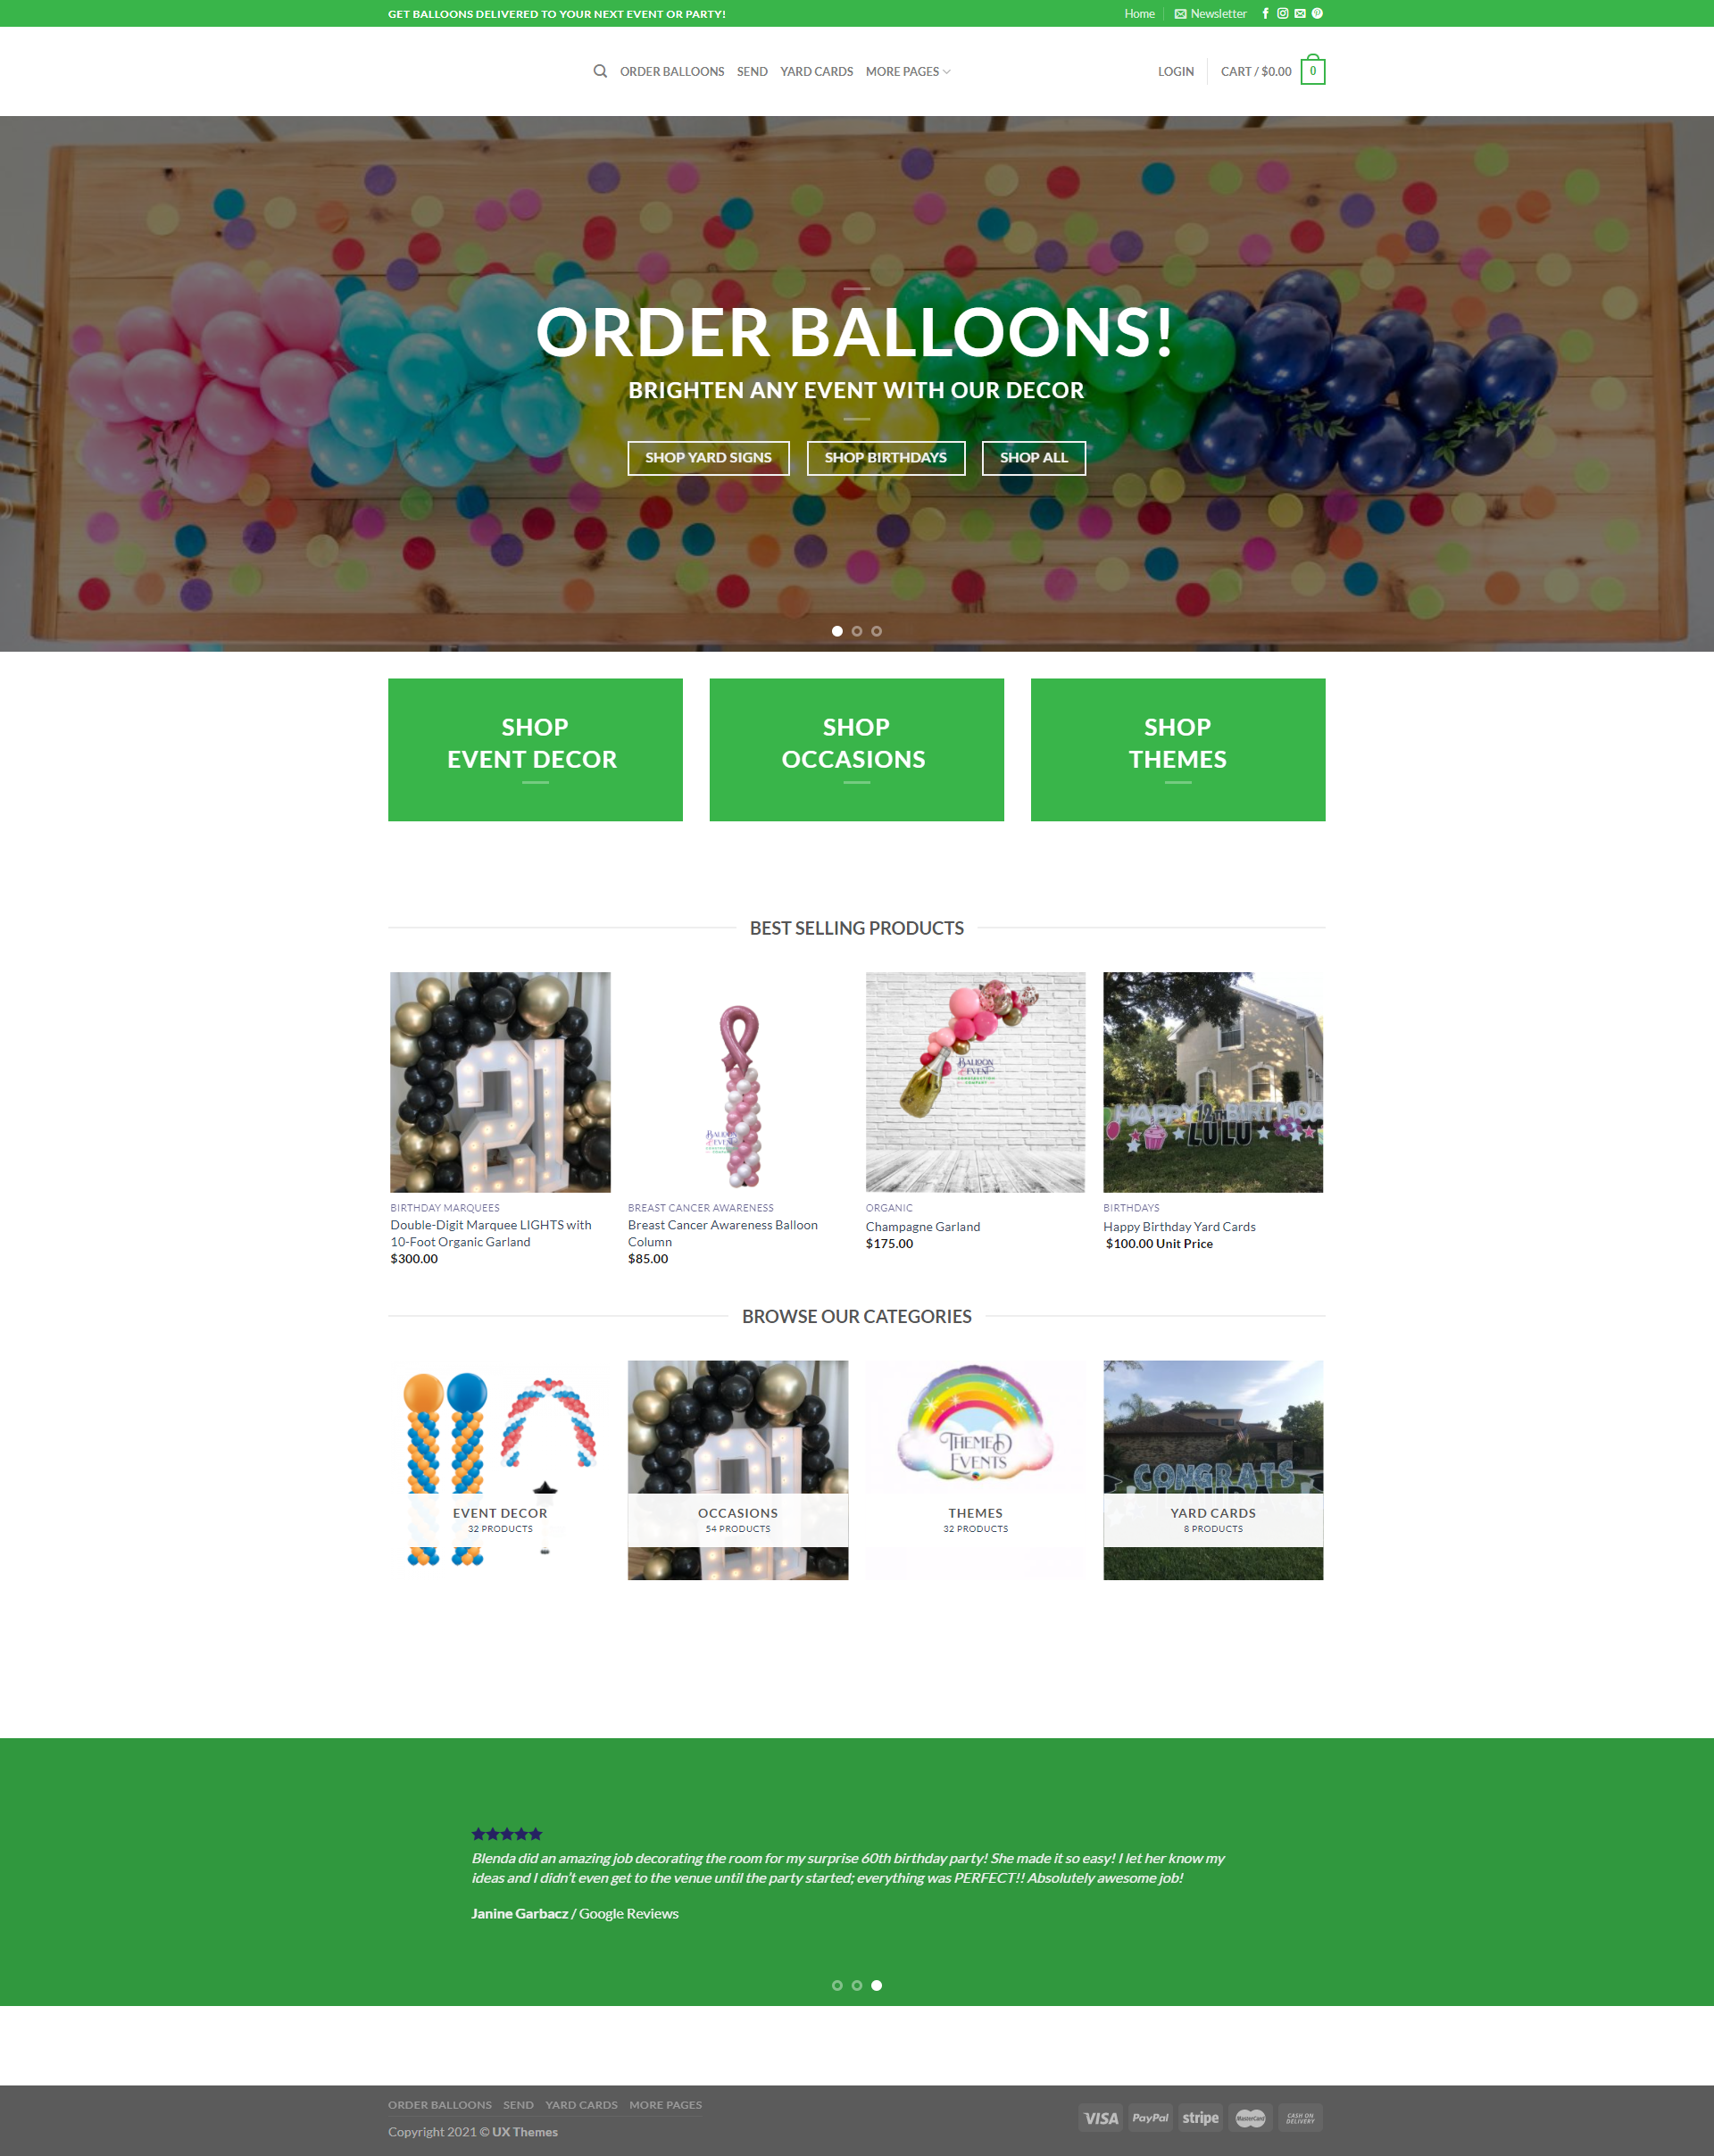
- With the header and footer built it is time to start building out the inner pages of the website. We start by creating the home page that features a slider and has the order form front and center. From there the focus is on creating the ecommerce shop. Starting with the top level catagories and working down to the sub categories and lastly the product pages. All of these pages follow a template so each product will be using the same single product template page.
During this process it is important that any work we do on the desktop version of the website we are also considering the mobile version. No section is complete until all breakpoints have been looked at and edited to fit within the different screen sizes.
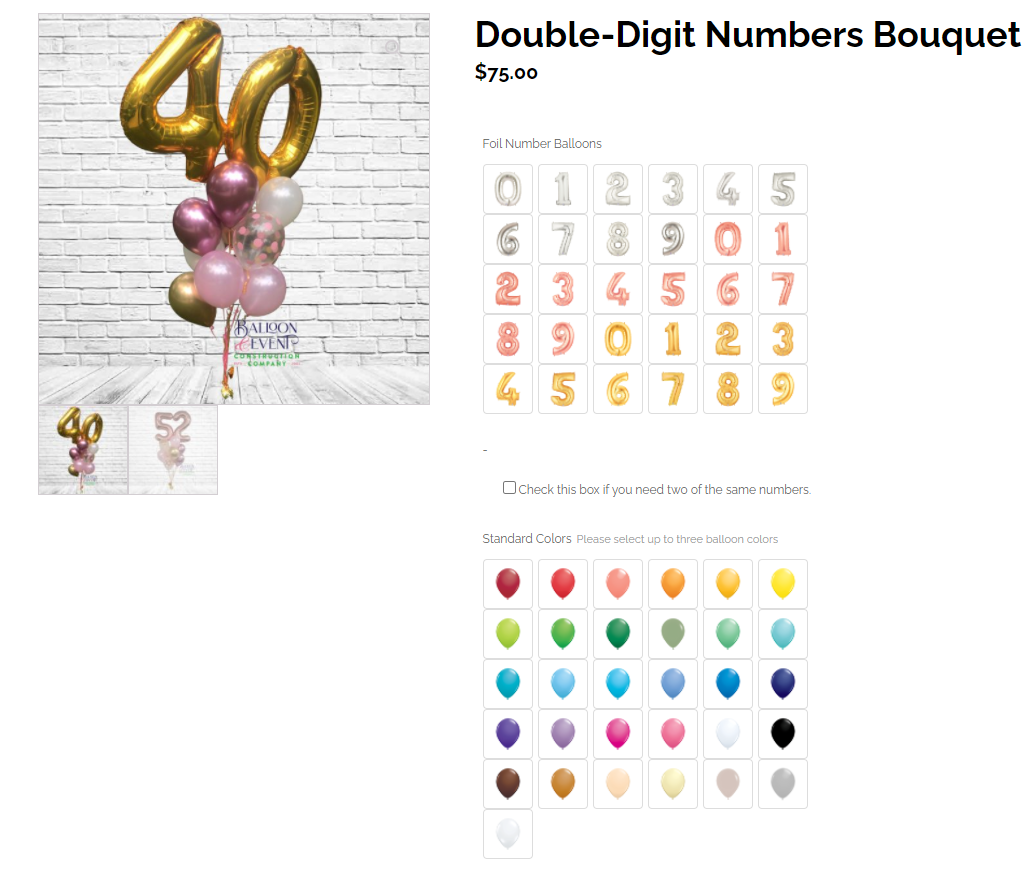
Once the shop has been fully built out and the informative pages (about us, contact us, FAQ, etc...) created as well it is time to start adding products. These products need to allow the customer to select many different customizable options such as balloon colors, arch sizes, foul balloon letters and numbers, and many more options. A simple dropdown box could work here but we wanted to add a simple method that is more appealing visually. The solution to this is a image selection seen in the image below.
Step 7: Final Touches
Before taking the website live we must run several tests to make sure everything is functioning properly. Stripe payment method is the first thing we test to make sure the website is taking payments and sending them to the right place. Next, we make sure we can block out order times in case a day becomes too busy or a holiday break is needed. Lastly, we test and make sure the delivery fee and taxes are working correctly. An order placed from different zip codes needs a different delivery fee based on distance. Once all of these things are tested the website is ready to launch
Step 8: Launch
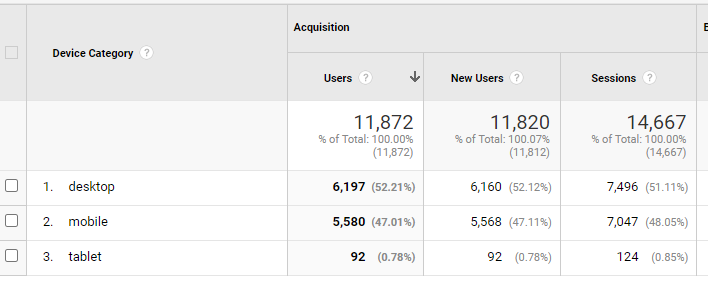
With the website live I can now install Rankmath. An SEO and analytics plugin that will help us track important data the website is bringing in. This connects to google analytics so we can track live and real-time data. The last step is ongoing as the work never truly ends. More products need to be added as the season's change and the business grows.